Thursday, September 11, 2014

First Day Fun

I know my blog posts are out of order! So are my thoughts right about now :)  Just go with it!  

In Kindergarten, we stagger enrollment so we only have half our class the first 2 days. (Do you do this wherever you are?) This is a great way for us to help the students learn the rules and routines, learn their way around the school etc.  

We always plan our day around some sort of story and I know a lot of teachers like to use The Kissing Hand, but I just didn't want to do that story this year, so when I saw this Cool Cat First Day of School Pack from Live Love Laugh Kindergarten, I knew which story I was going to use!


I knew the kids would love this book and it would make the first day a little more fun! Tammy includes hats and certificates, so we did both! 


We will definitely keep this tradition! I loved these! :) 

post signature

Wednesday, September 10, 2014

Trashy Crafter Review


Have you heard of the Trashy Crafter?  When Kim from the Trashy Crafter contacted me about reviewing something from her Etsy shop, I had no idea what she could possibly do.  I was pleasantly surprised when I clicked on over at what I saw!


Ever have a damaged book that you simply can't put in your library center anymore? What do you do with it? Throw it away...right? Kim and her mom take these books and roll them into beads and make jewelry with them! How cool is that?!

When you go to their Etsy Shop there are so many different categories of books, there is definitely something for EVERYONE.

In looking at the pictures, they immediately appealed to me because...I'm ALLERGIC to jewelry!! But guess what?! There is no metal!  A bracelet I can wear?? Finally, I can accessorize! 

They came in a padded envelope:


 And when I opened it, I saw this adorable little package all wrapped up! I love that it was all recycled!


I opened the envelope to find: 
These adorable bracelets!  Right on the card it tells you what book your bracelets are made from. Of course I knew mine would be made from Fox in Socks because I chose them.  (I LOVE that book!!) I also loved the bright colored beads on these bracelets!


I admit my wrists are a little big, I'm working on that, but fear not big wrist girls..these beauties stretch! 


Here you can see the words from the book...I LOVE them!


I'm so absolutely impressed by what Kim and her mom do! I hope you'll head over to her Etsy shop and take a peek at what they have to offer and get your shop on! Thanks Kim for allowing me to review these bracelets! I love them!! 

post signature

Tuesday, September 9, 2014

Jazzing up your Caddies!

I jazzed up my caddies last year after seeing a post from Erica Bohrer, but when I went to school this summer and started getting my room, I discovered my caddies were disgustingly dirty and a few of my book bins were cracked.  I order these gems from Oriental Trading and fortunately scored a free shipping coupon, so they weren't too much more expensive from Michaels or the teacher store where I couldn't find all the colors I needed.  

For this project you need:  The Caddies, The Book Bins, Ribbon, Scissors, A Hot Glue Gun, and Glue Sticks. (The Cordless Hot Glue Gun is not required, but let me tell you that it is well worth the extra $5-10 and I LOVE, LOVE, LOVE mine.)

I know absolutely nothing about measuring and ribbon, so I took a picture of the kind I used in case you needed to know that.


For the caddies, start on the long side, but in the middle.  Put your hot glue on half and lay the ribbon on top.

Keep doing the same thing all the way around until you get back to the front and then you will meet the two pieces together. Don't worry about the two pieces because you are gonna cover them.


These book bins had a line on them that I followed, and you do the same thing...start in the middle and go around.


 Ok, about the spot where the two pieces meet up.  To cover that you need a cute little sign.  I printed mine on card stock and laminated them.  I decided to vary the pattern and go with some chevron. I have both patterns in my room.


Glue them right on the front and voila:


These caddies look super adorable on my table and the ribbons just give them a little something! What do you do you jazz up your room?

Grab the Table Labels for Free here! :) 


post signature

Monday, September 8, 2014

Chicka Chicka Boom Boom Picture Frames

I'm a little late blogging about this one, but I had to get pictures taken for these frames to get them on the wall.  We make these frames with our kids EVERY year and leave them up all year! It's so fun to give them back to the kids at the end of the year and see how much they have changed! 

You need 1/4 of a yellow sheet of construction paper and then you die cut a rectangle out of it to make the frame.  The tree and polka dots are free form, so you just give the students squares/rectangles of each color of paper and model how to do those.   The letters are from Walmart/Michaels are are prebagged in Ziploc bags for each student.   (They have a sticker on the back, so they stick right on.)


This particular student did a really awesome job on cutting her pieces (This close up is from last year but I never got around to blogging about it last year for some reason!), but don't expect them all to look this perfect. I love how their little personalities show through a free form activity! They also tend to mix up the letters in their names and you may have to redirect them a few times :) 


When they are all finished, I add their pictures and staple them on the wall around my Coconut Tree. (I purchased this one a few years ago from the local teacher store and just leave it up all the time.) 

I adore this little craft and the kids are super proud when they are done!  My group this year did an amazing job and they all look so cute!
post signature

Sunday, September 7, 2014

Rainbow Names

This week our Unit was All About Me! On Fridays, my assistant always does an art project with the students that goes along with our theme.  In the past, I've always done popcorn kernel names or bean names, but I came across a picture of rainbow names this summer that I thought was simply adorable! (Of course I can't seem to locate it now!) Anyway, I knew that when we did this unit, I would be changing out our art project because this one is so much cuter!

Basically, you just write the student's name on white card stock in the rainbow color order.  I did read that you should use crayon instead of marker because the glue will cause the marker to run.  We used vegetable/fruit sorters from the Dollar Tree to sort the different colors of paper and that worked perfectly! 


The finished product:

They are soooo cute! I love them! :) 

post signature

Saturday, September 6, 2014

Classroom Reveal!

Okay I'm a little behind on revealing my classroom, I admit! I'm telling you, I'm just now getting things off my to do list that have been up there for 3 weeks.  The beginning of the school year has been OVERWHELMING.  More overwhelming that I can ever remember.  I think I bought too much new stuff over the Summer...remind me to tap the breaks on spending next summer and save my self some redecorating stress!  Anyhow, you've waited long enough...here's my home away from home :) 

Here's my favorite bulletin board! We changed it up a little this year and used yellow and white polka dot scrapbook paper for the letters and some stars I bought at Michaels instead of die cutting those this year.  This is on the wall outside my classroom and I tell my kids to look for it to find me! 


Our class list and wish list.

Our names, also cut out of scrapbook paper!  

Looking in my room from the door way:

Bulletin board at the back of the room: 

 Looking at the art center and back of the room...check out my beautiful curtains! 

Looking at the front of the room from the back of the room:

Looking at the back of the room from the front of the room:

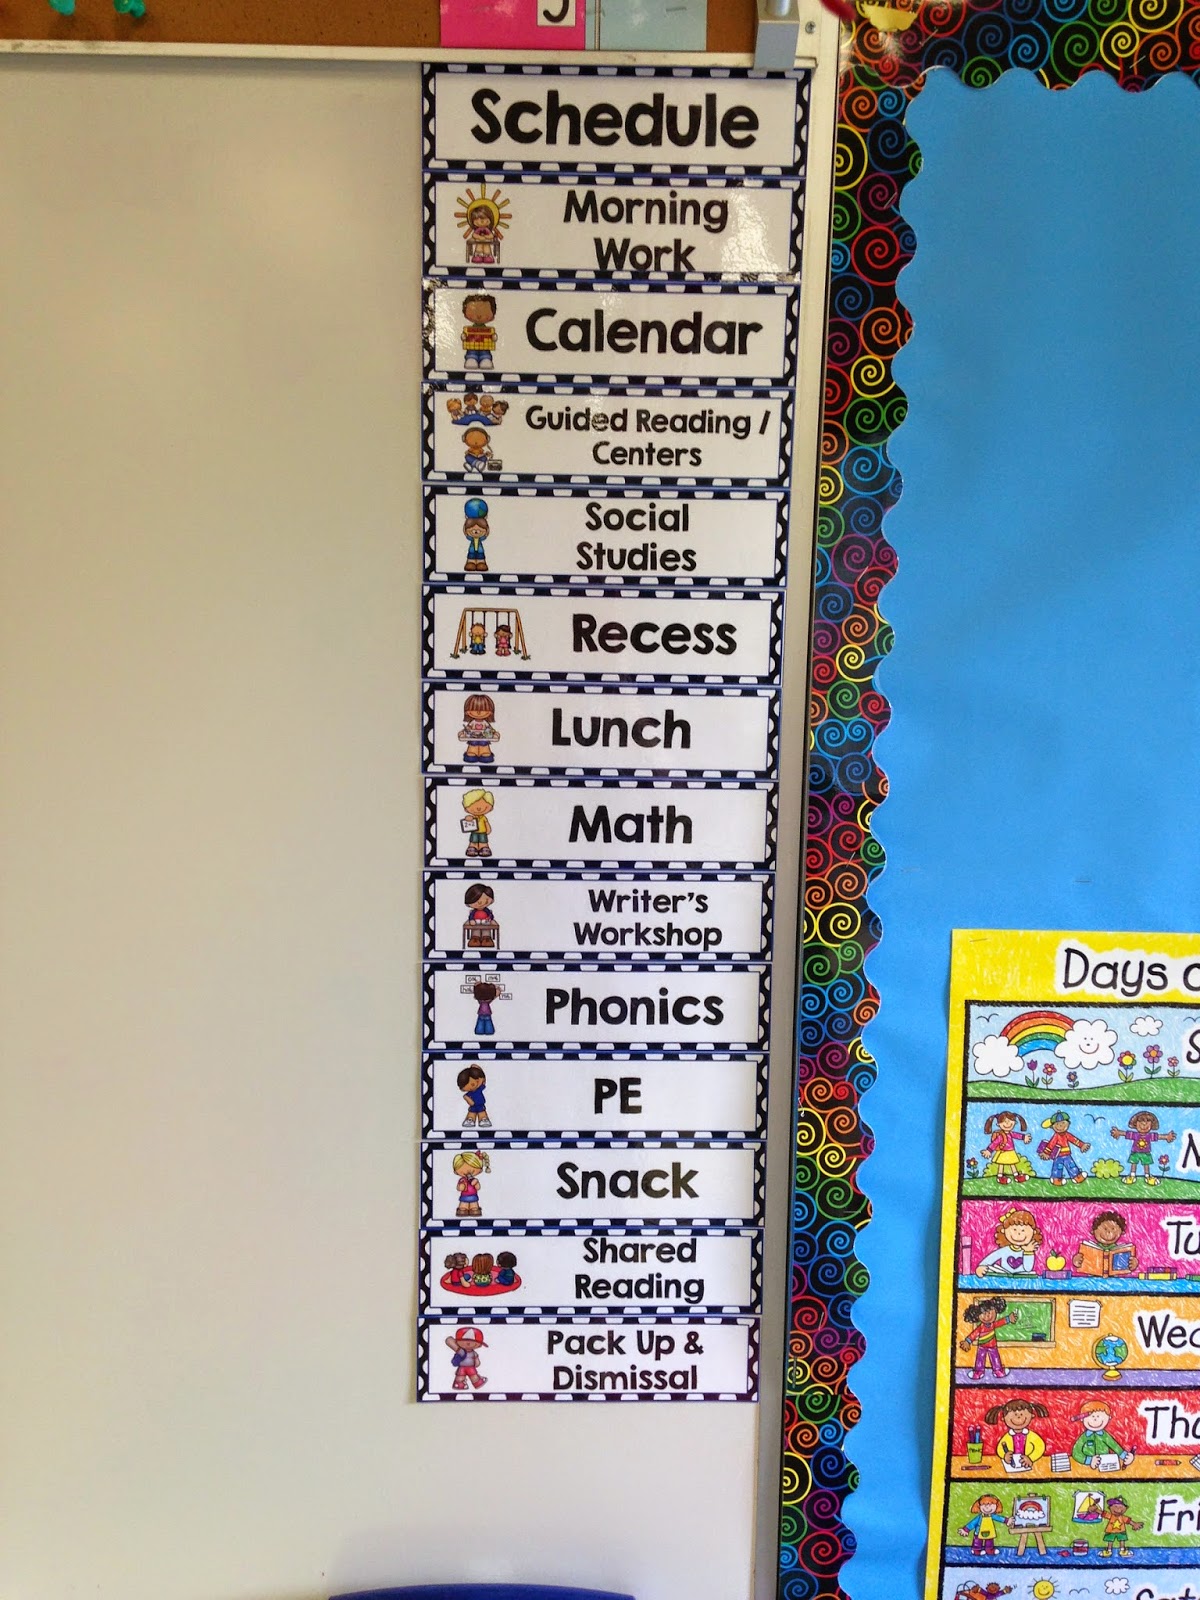
Our schedule on the board.  This really helps prevent them from asking.."When is recess?!" "When do we go home?!"

Our behavior chart.  I backed it on black this year and used wider ribbon and I'm basically in love! My friend across the hall backed hers on black last year and I don't know why she didn't peer pressure me into it then but we went on a Michaels trip together when she bought the black cardstock and I felt the need to jump on the bandwagon and SO glad I did! :) 

Here's a side view of the room: (With new curtains!)


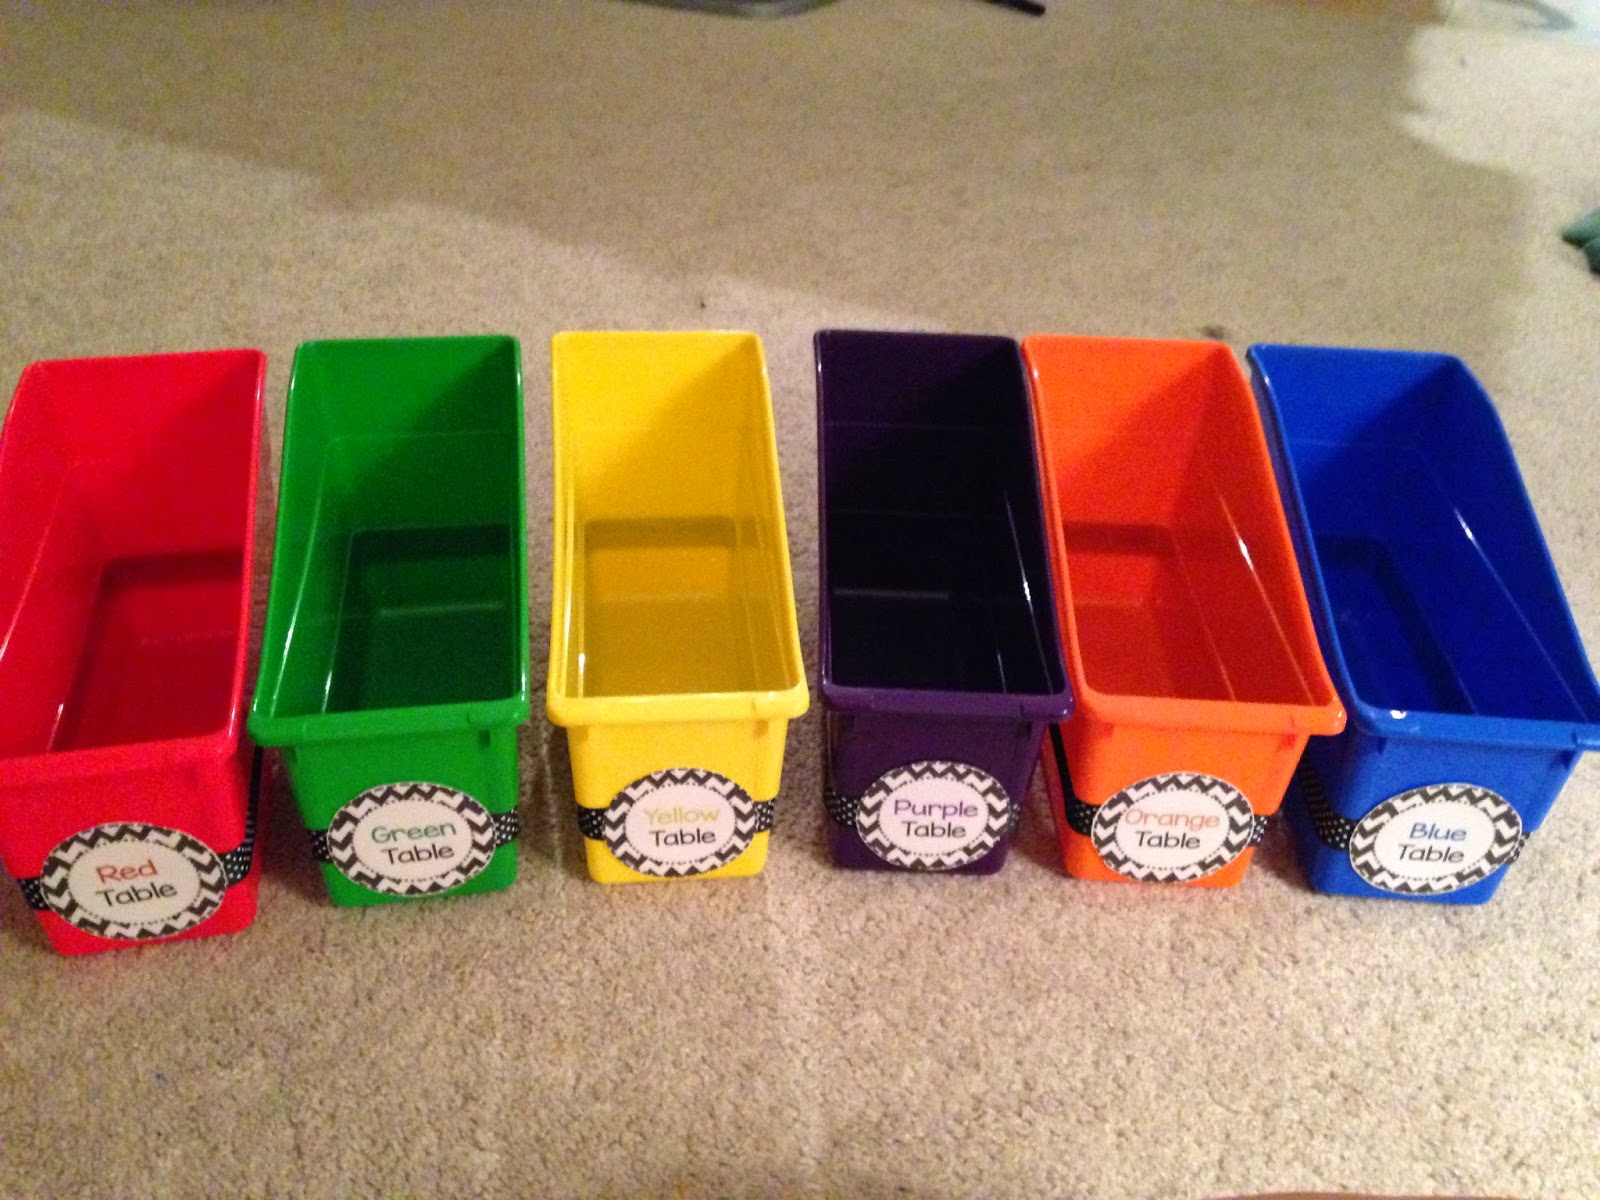
Here's what's in my caddies on my tables: Think you are crazy? You should have seen me trying to score a class set of those clear pencil boxes at Office Depot for 25 cents each.  You would have thought I was black Friday shopping...I'm a little OCD.


Here's what was out for open house:

And finally, the sign in table for open house.  Check out my new dry erase dots...a fun color! Thank you Bed, Bath and Beyond for ordering them for me! :)


So sorry for the delay, but at least I came with lots of pictures :) All of the work is well worth it because we are there all day and I want it to be a welcoming place for all my kids!  How does your classroom look? Leave us a link in the comments to check it out!


post signature
Related Posts Plugin for WordPress, Blogger...